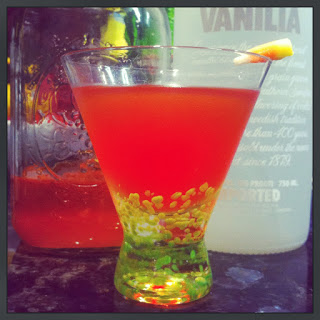
Two cocktails in a row, woot woot! Yeeeaaaaaah buddy, I've been breaking out of my wine-only rut and am back to experimenting with the cocktail shaker. I think I got stuck in between ginger flavours and tequila for awhile, so I'm excited to have something new to present to you: a Rosemary Gin Rickey, from photographer Elizabeth Morrow. You can find the original recipe here.
Rosemary is a tricky ingredient, for me. It can be overwhelming at times, a strange combination of woody and floral fragrance and taste. I was intrigued to give this a try, and let me tell you, I am a full-on fan. The rosemary simple syrup is just subtle enough to that you only get a TASTE of rosemary, and the garnish of fresh rosemary provides the perfect whiff as you sip. As I noted before with the Pimm's Cup, in many cases, a cocktail garnish is NOT optional!!! A garnish serves the very important purpose of stimulating your sense of smell, which is of course closely tied to your sense of taste and part of the whole experience of a cocktail. A garnish is a complement to the drink. USE IT.


Rosemary Gin Rickey
makes 1 drink
What You Need
1 ounce rosemary simple syrup
1 ounce freshly squeezed lime juice
1.5 ounces gin
club soda (I always prefer tonic water) to top off
spring of rosemary + white granulated sugar for garnish
What You Do
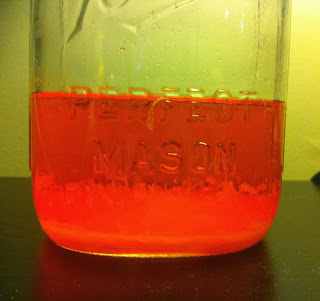
1. In a cocktail shaker over lots of ice, combine the first three ingredients. Shake for 30 seconds until the shaker is frosty. Pour into a highball glass over ice and top off with bubbles to your desired strength. Moisten a sprig of rosemary with water and roll around in some white sugar to give it that pretty, frosted look.
Oh, and hint hint--this would be a fantastically complementary pre-dinner cocktail for that Short Rib Ragu.
Rosemary is a tricky ingredient, for me. It can be overwhelming at times, a strange combination of woody and floral fragrance and taste. I was intrigued to give this a try, and let me tell you, I am a full-on fan. The rosemary simple syrup is just subtle enough to that you only get a TASTE of rosemary, and the garnish of fresh rosemary provides the perfect whiff as you sip. As I noted before with the Pimm's Cup, in many cases, a cocktail garnish is NOT optional!!! A garnish serves the very important purpose of stimulating your sense of smell, which is of course closely tied to your sense of taste and part of the whole experience of a cocktail. A garnish is a complement to the drink. USE IT.
Serve like so for effect, but of course, drop that baby tree into your drink before taking your first sip. I can't believe I actually have to tell people that, but there you go.
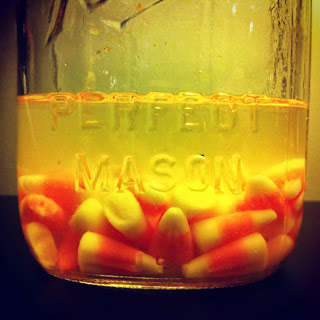
First, you must make the Rosemary Simple Syrup.
What You Need
makes 1 cup of simple syrup; scale as necessary
1 cup white granulated sugar
1 cup filtered water
4 sprigs fresh rosemary
What You Do
1. Making any simple syrup has the same (simple, hah) process: combine 1 part filtered water to 1 part sugar (usually white granulated) plus your flavouirng agent. You may recall we've used one before with before with the smashing Lemon Ginger Martini, with the original recipe being explained in the Carlos O'Brien. So all you do here is combine the ingredients in a small pot and bring to a boil over medium heat, stirring often to make sure the sugar doesn't burn or stick to the bottom of the pan. Let it boil for 1 minute such that the sugar is completely dissolved, then cover and remove from the heat. Let steep for 30 minutes, drain out the rosemary sprigs, and store in the fridge in an airtight container.
I absolutely adored the light, baby-spring-green colour the simple syrup wound up having (not evident in the photo above, unfortunately). You also eat with your eyes, after all! Onwards we go.
makes 1 drink
What You Need
1 ounce rosemary simple syrup
1 ounce freshly squeezed lime juice
1.5 ounces gin
club soda (I always prefer tonic water) to top off
spring of rosemary + white granulated sugar for garnish
What You Do
1. In a cocktail shaker over lots of ice, combine the first three ingredients. Shake for 30 seconds until the shaker is frosty. Pour into a highball glass over ice and top off with bubbles to your desired strength. Moisten a sprig of rosemary with water and roll around in some white sugar to give it that pretty, frosted look.
Oh, and hint hint--this would be a fantastically complementary pre-dinner cocktail for that Short Rib Ragu.