Posts tagged #lekker

Lekker: Quinoa Tabbouleh

No, I didn't sneeze. It's food, I promise.

TABBOULEH! Know it? It's a Middle Eastern grain salad that's been around for eons upon ages, and typically it's not one of my favourite foods. Nothing against Middle Eastern food, of course--in fact I love it--but tabbouleh usually has a consistency that is not very pleasing to my tongue. With this recipe so chock full of fresh veggies and salty goodness, though, we've got zero problems.

And yes yes I know. Quinoa (KEEN-wah, if you haven't heard the yuppies talking about it as the next big health craze for the last 5 years) is not the traditional grain to use in tabbouleh. TOO BAD; that's what I had in my fridge and I like it better than bulgur anyway because it's got more protein per serving: 8 grams per cooked cup versus bulgur's 6. This is also an excellent swap if you're gluten-free since quinoa is technically a seed, not a wheat product.

I am *also* aware that traditional tabbouleh does not contain carrots, olives, or feta cheese, but if you're going to say no to those types of things I'm not sure I want to be friends with you anyway.

So, onwards we go to this strangely addictive light vegetarian lunch or dinner option (oooorrrr just add some grilled chicken to blow that whole vegetarian thing out of the water)!

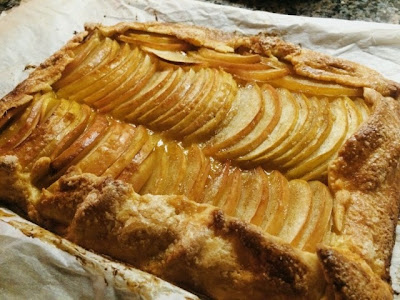
This is the only time grain salads look pretty. Not pictured: olives and feta cheese.

QUINOA TABBOULEH
serves two as a full salad for lunch or dinner; add grilled chicken if you want it a bit more filling

WHAT YOU NEED
1 1/2-2 cups cooked quinoa (I used tri-colour since that's what I had)
2 Persian cucumbers, diced small (Persian cukes are the little wee ones packaged in a tray and covered with plastic wrap; I like them because they're super crunchy with minimal seeds but feel free to use an English hothouse cucumber--the super long ones wrapped in cling wrap--as well. Regular cucumbers don't have the kind of crunch you want here.)
1 large beefsteak tomato or 2-3 smaller Roma tomatoes, diced
2 scallions, finely diced
1 medium carrot, peeled and diced
~1/3 cup kalamata olives, pitted and roughly chopped (Why are you bothering to measure a salad? Just take a "1/3 cup" to mean "a handful.")
~1/3 cup feta cheese, crumbled (or however much you want; I never let people tell me how much cheese I should or should not be eating dammit)
8-10 leaves fresh mint, finely chopped (Don't cheap out and use dried herbs! In this salad it's a total loss.)
8-10 leaves fresh Italian flat parsley, finely chopped
1 garlic clove, peeled and finely minced
Juice of 1 small lemon, pulp and seeds strained out
~1/4 cup extra virgin olive oil
salt & pepper, to taste

WHAT YOU DO
1. In a large bowl, toss together the cooked quinoa, diced cucumbers, diced tomatoes, scallions, carrots, olives, cheese, mint, and parsley. Then in a separate small bowl whisk up the garlic, lemon juice, olive oil, salt, and pepper until well combined to become your dressing.

2. Toss the salad with your dressing (add a bit more olive oil if it looks too dry), and leave it to chill out in the fridge for 15-20 minutes.

As I said, this dish is actually super addictive. I wasn’t a huge fan of it the first time I ate it, but after it sat in the fridge for an hour I had another serving, and the more I ate it the more I wanted to eat more of it until I was essentially just shoveling it into my piehole, grains and parsley leaves flying everywhere. I are sexy.

Buon appetito!

Posted on June 20, 2015 and filed under Lekker.

Lekker: Tomato Basil Mussels

Interrupting my series of traditional Roman recipes from my cooking class with Chef Andrea, I'm here to bring you one of my all-time favourite recipes--the sexy, tasty, PERFECT Italian inspired date night meal: Tomato Basil Mussels.

I first discovered these when I was in Italy last summer in a small town called Ospedaletti on the northern coast. I'd never had mussels before, but when my uncle ordered a pot I couldn't resist trying one. (Try everything twice, right?)

They're his favourite food, and he always cites a sweet story to go along with them: many years ago, he and his wife took a trip to visit my parents at their home in South Africa where they went to the beach to pick mussels straight from the shore. They cooked them right then and there on the beach in a pot of boiling seawater, accompanied only by a bottle of white South African wine that had been shoved into the wet sand to keep cold.

The mussels my uncle ordered on *this* particular salty beach night were still simple and delicious, but a little more dressed up with tomatoes and basil and a few other things I sussed out after being a complete weirdo in the middle of the restaurant, spreading the sauce out on a plate to closer examine the contents, sniffing it, tasting it, and generally making a strange sight of myself. NO SHAME IN MY TOMATO BASIL GAME THOUGH, because as soon as I got home to the States I got to work trying to replicate it and I think I've got it pretty down pat. *brushes shoulders off*

This weekend my main study abroad boo Gracia and I were able to snag our dorm kitchen for a two-hour block and got a chance to cook up these beauties. We'd spied them at the fish counter many times before, and at only 3 Euro per kilo (that's about an obscene $2 a pound, and my father nearly wept when I told him) it would have been foolish to resist.

Gracia is the closest I come to having a date over here but I do recommend this as an actual date meal, something to cook together. It's perfectly achievable by yourself, of course, but even more fun to do with someone else--and in my opinion, eating them is just plain sexy too: using your hands to eat, joining each other in giggles over struggling with the shells, juice dripping down...places...

Ahem.

Here we go!

LOOK AT THAT BEAUTY! I like to eat my mussels solely with a hunk of French bread to soak up the delicious broth, but Gracia (and many others I know) likes to serve mussels on top of a pile of spaghetti with the broth acting as a sauce.

That was a fake out, sorry. BEFORE we begin, a few things to know about mussels if you've never made them:

  • They're pretty cheap, as far as seafood is concerned--you can usually find them for about $5-$6 a pound in the States. When you're buying them at the fish counter inspect them closely for any broken shells or ones that are open. IF THEY ARE OPEN THEY ARE DEAD! Mussels should have dark glossy shells and be tightly closed, and they should not be stored on ice.
     
  • Mussels are alive before you cook them, so as soon as you get them home unwrap them and store them in the fridge in a bowl with some damp paper towels wrapped around them. Only buy mussels the day you plan to cook them.
     
  • About 20-30 minutes before you're ready for them to go into the pot, fill two large bowls with cold water and salt one a little bit. Dump the mussels into the bowl with the salted water (here they can "breathe" and expel any grit or sand they're holding on to) and go through them, tossing any that are broken or otherwise open.
     
  • Under cold running water, one at a time, use a small brush or pad to thoroughly scrub the outside of the shell to remove any barnacles and sea dirt. You'll also have to remove the "beard", which are fibers that protrude from the shell. It's gross and looks like something you'd find wrapped around your vacuum cleaner brush, but it's easy to get rid of--just hold the mussel in one hand, and with the other grasp the beard and pull down and out towards the hinge. The mussel will give it up. Toss the mussel (gently) into the second bowl of unsalted water and keep them there until you're ready to steam.

Tomato Basil Mussels
serves 2

What You Need
1 pound of mussels per person, approximately
2 T olive oil
1 smallish white or yellow onion, finely diced
2 cloves garlic, minced
1/2 cup dry white wine
1 28-ounce can whole peeled tomatoes in their juice, crushed roughly with your hands (so fun!)
1 large handful fresh basil leaves, roughly chopped
~1 cup low sodium vegetable broth (you might need a little more depending on how "brothy" you want the sauce to be)
1 lemon, scrubbed clean and sliced into rounds
To serve: a hunk of crusty bread, or cooked spaghetti. Or nothing at all, like the animal you are.

What You Do
1. Prep the mussels as described above. (This is where having two people comes in handy, because one of you can be doing mussel prep while the other does broth prep.)

2. Meanwhile in a large pot over medium heat, saute your onions and garlic together in the olive oil for about 4 minutes or until beginning to turn golden brown. Add the wine and cook for about 2 minutes more. Add the tomatoes, half of the basil, and the vegetable broth and turn heat to low to simmer for about 10 minutes or so just to let the flavours meld. 

3. Time to add your mussels! Drain them from their water bath and add them to the pot along with the other half of the basil and about half of the lemon rounds. Cover the pot with a lid and let those babies steam away for 5-10 minutes until they're all opened, stirring once in between to make sure that delicious broth gets all up into those nooks and crannies.

4. Garnish with a lemon slice and any basil you have left over, and serve! Discard any mussels that didn't open (they're probably dead) and have at it. You can use a fork to pry them out of their shells and into your waiting maw, or you can be uber sophisticated and use one of the shells to scoop it out. Enjoy!

Some advice: you might want to fish out the lemon slices from the pot before you serve. Depending on what kind of lemons you get, their skins might exude a little TOO much lemon flavour if they sit in the broth too long, making the whole thing decidedly bitter.

There is no love like that betwixt a woman and her mussels.

Ciao!

Posted on March 29, 2015 .

Lekker: Tomato Basil Bruschetta

Ciao tutti!

Long time, no chat! It's been a busy two months since I last posted, because of Christmas, New year's, and then--moving to Rome, Italy, for five months as part of a study abroad program at my university.

RIGHT????

I started a separate blog to detail these study-abroad adventures called A Broad Travelling, so feel free to go check that out to see what I've been up to. Given that I'm in arguably the world's most amazing country for food, suffice to say I've been eating my equivalent body weight in pasta, pizza, Nutella, gelato, and wine.

Cooking, however, has been a MONUMENTAL challenge. I'm living on campus in a dorm, with no cafeteria and only two regular-sized kitchens (one standard fridge, one small oven, and three oven burners per kitchen) intended to serve the cooking needs of over 140 students. It's frustrating and I miss cooking terribly, but we're doing our best to make it work.

Last week, blessedly, I had the chance to take an actual cooking class here in Rome at the elbow of a true Italian chef, focused on locally sourced and seasonal, sustainable food. (I blathered about it here, with tons more photos.)  I KNOW, THIS IS MY LIFE NOW GUYS. Fortunately for YOU, I have permission to share all those delicious recipes with you here! Thanks, Chef Andrea!

First up is my recipe for some simple, delicious Tomato Basil Bruschetta that I dreamed up years ago--and was thrilled to find out is also Chef Andrea's recipe. It's super simple and can be done largely in advance so you really have no excuse. Buon appetito!

Here, pictured next to a second kind of bruschetta that will also be coming up on the blog in the next few days!

Tomato Basil Bruschetta (a/k/a Bruschetta al Pomodoro e Basilico)
serves 4

What You Need
8 slices think white Italian bread, or any other kind that can answer the call to be bruschetta
4 large Roma tomatoes (though we used round tomatoes on the vine, here called 'Pomodori Colonna')
10-12 leaves fresh basil, roughly torn
1 clove garlic, peeled and crushed into a few big rough pieces
2 additional large cloves garlic, sliced in half lengthways
4 T cold pressed extra virgin olive oil, plus extra for drizzling (since this is a raw dish that involves marinating, it's REALLY important to use a high quality olive oil)
salt and pepper, to taste

What You Do
1. Roughly chop the tomatoes into a small dice (don't worry about removing skin or seeds) and combine in a small bowl with the torn basil leaves, crushed garlic, olive oil, salt and pepper. Toss to combine and leave to marinate out on the counter for at least 30 minutes and up to several hours.

2. Grill the slices of bread on your stovetop (or in your oven, or in your toaster) until lightly golden brown and possibly charred in a few spots. You want it to get nice and crispy and dry.

3. Rub one side of each slice of bread with half a clove of raw garlic, just lightly. Then drizzle each slice of bread with a tiny bit of olive oil.

4. When you're ready to serve, simply compile your tomato-basil topping on top of each slice of toast, and serve. You can fish out the chunks of garlic if you have extra-sensitive guests, but I personally LOVE the spicy kick of garlic so I leave it in. I don't care to kiss anyone that can't get down with garlic, anyway.

Lekker: Inverness Risotto

I wrote this post instead of doing homework. College is going great, thank you for asking.

Today's post is about one of my favourite dishes that I was introduced to by my old roommate, TB. (Remember him?) This is his classic, so I've named it after the street we used to live on: Inverness Risotto.

Risotto is awesome. I rarely get to eat it because it's basically just carby indulgence, but it's SO GOOD and there are so many ways to change it up. This recipe is my favorite and the way I remember TB making it most often: just mushrooms, peas, and onions. It's a classic flavour combination and I'm sure you'll love it. If you don't...well, sucks to be you I guess.

Hungry yet?

Risotto is awesome, but it's also time consuming. It needs constant attention, much like a baby or a needy girlfriend, but you can't eat a baby.

You've probably heard before that if you want nice fluffy rice with properly separated grains, you never stir or otherwise disturb the rice when cooking. The exact opposite is true of risotto. That's because stirring rice during cooking releases the starch in the grains, and starch is a thickener--a necessary component for risotto but one that results in goopy rice for other dishes.

The point is, don't assume you can multitask very well whilst making this dish. Fortunately the end result is totally worth it, and to me the constant stirring and monitoring is oddly soothing.

Stretching the definition of science here, but that's as science-y as I feel like getting. 

Don't trouble yourselves about the shrimp-looking things in there. That's langosteen, and it's like the middle child between shrimp and lobster (aka it's amazeballs) but it's completely wasted hidden in here. #imessedup

Inverness Risotto
serves 4

What You Need
3 T unsalted butter
1 T olive oil
1 cup Arborio rice
1 cup dry white wine (You know me, it's always Sauvingnon Blanc over here.)
3 cups chicken or vegetable broth
~6 oz baby bella mushrooms, finely diced (I know, that's a dumb measurement and I'm sorry; basically it wound up being 6 mushrooms but it really depends what size they are. Just use your judgement and remember that mushrooms shrink considerably when cooked; risotto is all about proportion between rice and other ingredients.)
1 cup peas, fresh or frozen & thawed
1/2 a yellow onion, finely diced (You could use a shallot instead if you want.)
1/4 cup shredded Parmesan cheese
Zest of 1/2 a lemon
Salt & freshly ground pepper, to taste (Though you probably won't need any salt since most broth is salty enough.)

What You Do
1. So you've lovingly diced up your onion and mushrooms so that they're approximately the size of a pea, yes? (Well, the mushrooms can be slightly bigger since they'll shrink down during cooking, but you get it. You're smart. You also look extra fabulous today, if I may say so. Those pants make your butt look great!) My point is that you want consistency in size for a risotto.

Shit. Where was I.

Okay so in a medium sized deep saucepan or wok (anything you'd do a stir fry in really) over medium heat, melt one tablespoon of the butter. Add the diced onions and cook them until they're soft and translucent and all kinds of golden-brown delicious. Remove them into a bowl and cover to keep warm.

2. Add the second tablespoon of butter, melt, and add the mushrooms, cooking THOSE until they're also kinds of soft and golden-brown delicious. Nom nom nom. Dump those in the same bowl with the onions.

3. Now the fun starts! If you have laundry that needs to go into the dryer or a wine glass that needs to be topped off, now's the time to do that because you're about to set up shop at the stove for about 30 minutes.

The mushrooms will have soaked up the majority of that butter, so go ahead and toss in that final tablespoon of butter along with the tablespoon of olive oil. Once the butter is melted, toss in your dry rice. This is a process called "toasting" and quite frankly it adds such a delicious deep, nutty flavour to rice that I think it should be done before cooking ANY rice dish. But anyway. Stir the rice very often so it doesn't get burned, and after about 3-4 minutes you should be able to smell that lovely nuttiness and see the grains beginning to turn translucent at the very edges.

4. Slowly stir in the wine and turn the heat down to a simmer. Keep stirring. Stir again. Park your ass at that stove and don't expect to go anywhere for the next 20 minutes, because that's what you do with risotto. You stir it and baby it and gently coax all that delicious starch out of those grains and TRUST ME, it is worth it.

5. Wine's all gone? (I mean the wine in the pan, not the one in your hand. I am *sure* that's gone.) Excellent, now time for the chicken broth. Add 1 cup of warm chicken broth, stir, and cook until mostly gone. Repeat with the second cup.

6. When it comes time to add the third cup, toss in your onions, mushrooms, peas, lemon zest, and cheese at this point as well. Keep cooking and stirring (gently now) until about half of the liquid is absorbed (it should still be reasonably creamy), and voila. You have risotto!

Serve as a side dish, or just enjoy an indulgent bowl of carb wonder.

Posted on December 10, 2014 .

Lekker: Lemon Sage Butter Roasted Turkey

Gobble gobble gobble bitches! If I was some fancy cook I would have done this turkey as a test before Thanksgiving, and posted enough in advance so that you, my faithful followers, could make it yourselves for that happy day of gluttony.

Alas! I am but a poor and busy girl, so go ahead and bookmark this bad boy for your Christmas festivities or for Turkey Day next year. I'm not just saying that because it's *a* turkey recipe, but because: this is the best roasted turkey I have ever had.

(Everyone knows deep fried turkeys are the BEST turkeys, but not everyone wants to mess around with 30 gallons of boiling hot oil.)

LOOK AT IT!

Like no lie, I'm not meaning to boast because any time something of mine turns out so perfectly I'm 98% convinced it's a fluke, but--THIS IS THE BEST AND MOISTEST, MOST DELICIOUS TURKEY EVER!

Crispy brown skin, check.
Moist, succulent breast meat, check.
The kind of gravy I'd kill for, check.

Hooolllyyyyyyy shit. This one's a game changer.

So! Onwards to it then. This is a long-ass recipe because it covers the whole she-bang from the brine to the gravy and everything in between. The brine is a bit tedious and requires advance planning, but the rest of it is quite simple in execution.

First: To brine or not to brine? That is the question. Well, maybe not, but it's a much better question that that other esoteric bullshit.

~Kidding~, kind of, because Hamlet is my favourite Shakespearean work--but I have to believe that if the good ol' Prince of Denmark knew anything about Thanksgiving turkeys he would definitely be asking MY question instead. So, back to it--to brine or not to brine?

There's copious debate about this on the web and equally so among my friends and fellow home cooks. When informally polled, those who were pro-brining swore by it while others simply brushed it off with a "Meh, not worth it."

Alternatives to the traditional wet brine are a dry brine, a salt crust, or no extra preparation at all save removing the plastic.

This year, since I was cooking Thanksgiving dinner (my first by myself) at my Dad's house which boasts two fridges and the ideal 5 gallon bucket, I figured I would take the opportunity to do a classic wet brine. I'm sure in future years when I'm cooking Thanksgiving dinner in god-knows-what far flung locale, I'll be pressed to try these other more convenient brining methods and indeed, I look forward to it.

Let's get to it cluckers!

LEMON SAGE BUTTER ROASTED TURKEY
serves 4-6 people

WHAT YOU NEED

For the brine:

  • a 5 gallon bucket or other very large pot, washed & dried
  • 1 12-14 pound turkey (which will feed 4-6 people plus leftovers; I used Butterball)
  • 8 bay leaves
  • 2 T whole peppercorns
  • 2 T dried sage
  • 1 T dried thyme
  • 1/2 cup brown sugar, packed
  • 1 cup rock salt or other large grain salt (kosher, sea salt, etc.) (if you only have fine grained table salt, you might need to reduce it to just over 3/4 cup)
  • 1/2 cup lemon juice (bottled is fine)
  • 1 can light beer
  • 1 lemon, quartered
  • Water

For the roasting:

  • 1 stick (1/2 cup) salted butter of choice, softened (I am batshit crazy about Kerrygold Irish Butter for fancy things like this)
  • 1/4 cup finely chopped fresh sage leaves
  • 2 lemons, zested, and the juice squeezed from only one (strain to avoid any pulp or seeds)
  • Freshly ground pepper
  • ~2 cups low sodium chicken broth (you'll need to fill up the bottom of the roasting pan to about 1/2 an inch)

Additionally:

  • 1/2 a stick (1/4 cup) salted butter of choice, melted
  • 1 T chopped fresh sage leaves
  • 1 t lemon juice 

For the gravy:

  • Pan drippings, drained of fat
  • 3 T flour, mixed with 1/3 cup water to create a smooth mixture
  • 1 cup dry white wine
  • 1 cup low-sodium chicken broth (possibly)
  • 1 cup water
     

WHAT YOU DO

To Brine:

1. First you gotta brine, about 24 hours before you plan to roast. In a medium sized pot over medium heat, combine the salt, sugar, spices, and lemon juice with enough water to fill almost to the top of your pot. Bring to a low boil and stir until all the salt and sugar is dissolved. Remove from heat and let cool.

2. In the meantime take your turkey out of the fridge, unwrap it in the sink, and remove the neck and giblets and whatever other weird body parts they've stuffed inside there. You can do whatever you want with those since I won't be using them. Rinse the turkey with cold water inside and out, and plop it into your makeshift poultry hot tub.

3. Pour your dissolved mixture over the turkey, along with the beer and lemon quarters, and then fill the bucket the rest of the way with plain water until the turkey is just covered and stir. You may need to weight it down with something to make sure it stays immersed; I found that if I just sort of jammed it in there properly it stuck.

4. Stick that monstrosity in the fridge to chill out for about 24 hours, or until about an hour before you need to roast.
 

To Roast:

1. Hooray, it's T-Day! Time to get going. About an hour before you need to stick the turkey in the oven (check the packaging directions to find out how long your turkey will need to cook; I had a 13.45 pound turkey and it took about 3 hours and 20 minutes) remove it from the brine and place it on a roasting rack set inside a roasting pan. Pick off any solids like bay leaves and peppercorns and such and throw the brine down the drain. Allow the bird to come to room temperature for about an hour. Chill the hell out about bacteria and whatnot, it'll be fine.

2. Preheat your oven to 450 degrees F. In a small bowl, mash together the butter, lemon zest, lemon juice, sage, and freshly ground pepper. Now here you have to do something kinda gross/mostly cool: run your hands underneath the turkey skin on top to separate it from the breasts. There's a thin sort of membrane that attaches the skin to the flesh and you'll feel it give way as you separate it.

3. Take half the butter mixture in your fingers and insert it in between the skin and the breasts you just separated, rubbing and smoothing it out until the breasts are well covered.

This is sounding a bit suggestive at this point but tbh who doesn't want to be rubbed down with Kerrygold Irish Butter? 

Rub the other half of the butter mixture all over the outside of the turkey, in all the crevices like the wings corners and drumsticks.

Like so.

That's my Maple Bourbon Pumpkin Cake chilling behind me, and a mimosa in my hand because it isn't a holiday unless it's started with some bubbly!

4. Woo! All done and time to go in the oven. Last thing you have to do is pour in about 2 cups of chicken stock or broth into the pan so that the drippings won't burn during roasting. Toss that bird (we named ours Dorothy because I'm macabre and weird) into the oven at 450 for only 15 minutes. This blast of heat allows the skin to get a jump start on browning. After 15 minutes, turn the heat down to 350 degrees and set the timer for 1 hour.

5. Somewhere in that hour, melt the additional 1/2 stick of butter and mix with the extra sage and lemon juice. After the timer goes off, remove turkey from oven and baste with pan juices and some of the melted butter mixture. Replace back into the oven, and repeat two more times until turkey registers 160 degrees F when a meat thermometer is inserted into the thigh, or about 2-ish more hours. If you find that the breast is browning too much (at around hour 2 for me) you may gently cover it with a bit of foil.

The last baste...look at all that yummy sage and lemon zest! And those pan juices are destined to make a bomb ass gravy.

To Grave

(.......I went with it)

1. Once the turkey is done, remove it to a plate or carving board to relax for about 20 minutes to let the juices disperse throughout. Cover with foil to keep warm. Toss the roasting rack into the sink, and pour off the majority of the fat from the bottom of the pan into a separate heat-safe dish. You can use one of those nifty gravy-fat separators if you want.

That should leave you with just the delicious drippings in the pan. At this point you have the option of cooking the gravy directly in the pan set over two burners; or if you used a nonstick pan like I did, you can just pour all the drippings into another more manageable smaller pot. However if you did NOT use a nonstick pan I DO NOT RECOMMEND THAT! All those browned bits stuck to the bottom will be left behind and they are total flavour bombs. You'll want to include them in your gravy.

2. At any rate, bring the drippings to a rapid simmer and whisk in the flour and water mixture. Whisk constantly and cook for about 4 minutes to thoroughly cook out all the raw flour taste. The gravy should thicken considerably at this point. Then add the wine, and cook for about 8 minutes, whisking often, until most of the alcohol has burned off. Whisk in the water, and TASTE! The salt level at this stage is important. All that salty butter and chicken broth may have provided more than enough salt for your tastes. If the salt level is good, do not add chicken broth and instead simply add more water until your gravy reaches the desired consistency.

Serve over your carved turkey, and I'm sure you will have a very happy table! Bon Appetit!

Posted on December 1, 2014 .

Lekker: Maple Bourbon Pumpkin Cake

My last blog post was about the amazingly simple Salted Butter Apple Galette, which I love as an alternative to pie because I hate pie. SUE ME. In that pies are traditional for Thanksgiving dessert and my hatred of them does not take holidays, I opted to make this Maple Bourbon Pumpkin Cake.

I chose this because

1. bourbon and
2. because I didn't want a painfully sweet saccharine dessert.

This cake strikes the perfect balance between sweet (the glaze and the maple candied pecans) and boozy-spiced-fall-ness, and was a hit at my table. Try with vanilla ice cream.

I like to envision this method of decorating as all the pecans coming to worship at the pecan Altar of Candied Wonder in the middle.

It doesn't really matter which bourbon you decide to use. Maker's Mark is my do-or-die favourite, but I am poor now and cannot afford that so I was good ol' Jack for me. Most of it bakes off though, so honestly it doesn't make any difference.

So, let's get baking!

MAPLE BOURBON PUMPKIN CAKE
serves 8

WHAT YOU NEED

For the cake:

  • 2 3/4 cups all purpose flour
  • 1 T baking powder
  • 1 t pumpkin pie spice
  • 3/4 t salt
  • 1 1/2 cups firmly packed dark brown sugar
  • 1/3 cup unsalted butter, room temperature
  • 2 eggs
  • 1 t vanilla extract
  • 1 cup cooked pumpkin (Use the tinned stuff like I did, since I had leftovers from making one of my all-time favourites: Pumpkin Soup.)
  • 3/4 cup whole milk
  • 1/3 cup bourbon of your choice

For the glaze:

  • 2 cups confectioner's sugar, sifted after measuring
  • 2 T half-and-half
  • 1 T melted unsalted butter
  • 1 1/2 T bourbon
  • 1 t vanilla extract

For the maple glazed pecans:
Shocking that you would need pecans and maple syrup, right?

  • 1/2 cup pecan halves
  • 2 T pure maple syrup
  • 1/2 t cinnamon


WHAT YOU DO

1.  First things first, in a small bowl mix together the pecans, maple syrup, and cinnamon really well. These babies are gonna soak in that goodness while you're mixing up the cake. Give it a stir every once in awhile to make sure the syrup gets into allllll the nooks & crannies.

2. Preheat your oven to 350 degrees F and grease two 8-inch round cake pans. (I suppose this cake could also be done in a Bundt pan or some other loaf pan, or as cupcakes, but I don't know the cooking times and what have you for that.)

In a medium sized mixing bowl whisk together the flour, baking powder, pumpkin pie spice, and salt. Whisk it well, since I'm saving you the hassle of actually sifting that flour separately to aerate it!

3. In another larger mixing bowl, beat the butter with an electric mixer until light yellow and fluffy. Add the brown sugar, and beat again until light and fluffy. Add the eggs and mix well. See: light and fluffy. (Get the picture?) Then add your pumpkin and vanilla. It might look a little grainy and weird after you add the pumpkin, but don't try to overbeat it just to get rid of that. It's fine.

4. With your mixer on low, add half the flour mixture to the wet batter. Mix well. Add the milk, and mix well. Add the other half of the flour, and ___ ____. Finally, dump in the bourbon and mix well-ish.

5. Pour the batter evenly into your pans, and bake at 350 for about 20-ish minutes or until a toothpick inserted in the center comes out clean. Remove the pans and set on top of wire cooling racks for about 10 minutes (this gives the cake time to contract from the sides of the pan) and then flip out onto the racks to finish cooling.

6. *While* those babies are cooling, and your oven is still at 350, it's time to do the pecans! Line a baking sheet with parchment paper, and dump your maple coated pecans on there. Bake for 5 minutes, then remove and toss, and bake for 5 minutes more. That's all it should take for them to go all nicely dark brown and smell amazing. Feel free to taste test one.

7. Since that only took 10 minutes and your cakes are probably still cooling, you can mix up your glaze now and give it time to set up.

Tangent: I have a love-hate relationship with glazes. They are easy because they literally involve just dumping everything together and stirring until smooth (so...do that), BUT. Since glazes have a more liquid consistency than frosting, you kind of just dribble it down over the top of the cake and hope that it will come dripping down the sides attractively. But if you want those attractive little drips, then you can't pour too much glaze on...WHICH MEANS THERE ISN'T ENOUGH GLAZEY GOODNESS ON THE DAMN CAKE! And I won't stand for that.

So what you should do is schmear a decent amount on the inside of your two 8-inch layers as a filling, and *then* content yourself with dribbling the glaze over the top. If you want to put something else or nothing at all in the middle, then here's what I suggest: do one layer of slow glaze dribbling. Stop. Leave it alone for about 15 minutes, giving it time to set up. Then come back and do a second layer. It still won't give you a ton of glaze on the sides, but there's more on the top and whatever, I suppose that works.

8. I honestly don't even remember where we were now. Oh right, okay so you made the glaze. Once the cakes are cool, stack them on a cake plate and glaze accordingly as discussed/ranted about above. Decorate with the pecans as you wish. Done!

It would have been nice if I had remembered to take a photo of the *inside* once we had cut a slice, but no. Of course not. FOR THE RECORD, though, it's a lovely dusty dark orange.

Recipe originally inspired by this one by Bakerella.

Lekker: Salted Butter Apple Galette

It's here, it's here, it's finally here!!! Happy Thanksgiving guys!

I can't wait to share with you some of the things I'm making for today, after they are taste tested by my highly qualified tasting panel (hah). On the menu is a Lemon Sage Butter Roasted Turkey with white wine gravy; my classic Perfect Mashed Potatoes; Sourdough, Italian Sausage, and Roasted Chestnut Stuffing; and a luxury Green Bean & Mushroom Casserole. I'm not a fan of dessert pies, generally, and so for dessert I opted for a Maple Bourbon Pumpkin Cake.

If you find it utterly sacrilegious not to serve apple pie for Thanksgiving dessert though, may I propose this delicious and simple Salted Butter Apple Galette as an updated alternative?

Isn't it beautiful?! And so deceptively simple, too. The ingredient list is short, and you just might already have everything you need around the house. It never hurts to have a back up just in *case* one of your preplanned desserts doesn't entirely work out.

This recipe is straight from the hallowed halls of Bon Appetit Magazine, with whom I enjoy the most majestic of love affairs, so I'm just going to link to it right here.

The only changes I made were to use a teaspoon of vanilla extract instead of bothering with vanilla beans. Don't be intimidated by the apple slices! If you have a mandolin of course you can use one, but I just sliced neatly with a steady hand. The tart dough is easy to whip up too, just make sure you have some time for it to chill in the fridge. Onward!

Ah, look! Proof, that I do, actually, do all this cooking! And yes, I am using an empty wine bottle as a rolling pin, because why not?

It should look like this right before you pop it into the oven. Num num num,

And...fin!

Lekker: Vegan Sweet Potato & Black Bean Chili

Hello there, and Happy Thanksgiving pals!

As a foodie I'm sure you can imagine that this is very nearly my favourite holiday of the year. Christmas is my actual favourite, but only because it's LONGER.

Because Thanksgiving is just one day I feel like it never really gets its proper due, so when I "grow up" one day I plan to host Thanksgiving dinners at least twice a year. It's such a great excuse to get together with friends and family for quality time, and besides, there's just too many cool recipes I want to try. Once per year is not cutting it. Bollocks.

(That plan hinges on the obviously faulty logic that I will, in fact, one day grow up--but nevermind.) 

Surprising no one I've been planning my Thanksgiving menu since sometime in September, and I ultimately decided that sweet potatoes were axed from this year's menu. Since it's just my Dad, my 20-year-old body building brother Champ and I for dinner this year it's quite the small party, and thus I had to be painfully limited with my side dishes.

Champ threw a hissy fit when he found out I wasn't doing sweet potatoes because OF COURSE he doesn't care about anything, ever, but the **second** I say no to something it's immediately the most important thing ever--but I'M IN CHARGE HERE DAMMIT!

However in light of the "family togetherness" of the holidays etc etc etc I yielded somewhat to the sweet-potato-based pressure by cooking up this vegan sweet potato and black bean chili for dinner.

None of us are vegans here but it's so lean, filling, and chock full of wholesome things, it'll make you feel better about yourself before you dive in face first to the gluttony and gravy-induced stupor that is Thanksgiving the following day.

Chili never looks particularly appetizing, but damn if it isn't delicious.

And yes, my father promptly ruined the "vegan" aspect by topping it with a mountain of shredded cheddar cheese.

VEGAN SWEET POTATO BLACK BEAN CHILI
serves 4

WHAT YOU NEED

  • 1 very large, 2 medium, or 3 smallish sweet potatoes, peeled and diced small
  • 1 teaspoon paprika
  • 1/2 teaspoon salt
  • Freshly ground pepper
  • 2 tablespoons olive oil, divided
  • 1 red or green bell pepper, diced
  • 1 medium onion, diced
  • 4 cloves garlic, diced
  • 1 green jalapeno, seeds removed and flesh diced
  • 1 teaspoon ground cumin
  • 1/2 teaspoon oregano
  • 3 1/2 cups cooked black beans (or 2 15-oz tins; see my note below if you want to cook them from scratch)
  • 4 teaspoons adobo sauce from a tin of chipotle peppers in adobo sauce (if you like your chili more on the spicy side, feel free to add in one of the chipotle peppers, chopped)
  • 1 28-oz tin diced tomatoes with their juice
  • 1 teaspoon white granulated sugar
  • 1 teaspoon unsweetened cocoa powder
  • 1 cup water or vegetable broth, to thin it out

Optional, To Screw Up The Whole Vegan Thing: Sour cream or shredded cheese, to serve


***On black beans from scratch:***

My Mother, God rest her soul, was born and raised in Guatemala on the traditional staple diet of black beans and rice. Do you think they use tinned beans down there? LOL, no. That's an American convenience, and it is convenient--but cooking your own is stupidly easy and SO worth it.

As the beans cook they release starch and flavouring into the cooking water, yielding this black salty broth that acted as my liquid in the chili recipe, and tastes AMAZING. Like I could sip that from a mug all day in bliss. These are the beans I remember from my childhood, and if you did a taste test of beans from scratch next to tinned beans, I absolutely guarantee without a doubt that the beans from scratch will come out on top, every time.

For God's sake, just make sure that they are fresh beans. The first time I made this recipe I used a batch of beans I dug up from the back of my Dad's pantry that I later found out were AT LEAST six goddamn years old. Turns out the older the beans are, the longer it takes to cook--which in this case was SIX HOURS PLUS AN OVERNIGHT SOAKING. It felt like forever. I felt like I was stuck in some kind of parallel universe where nothing cooked.

That's it for my rant on beans for now, but I'm planning on writing a recipe for cooking your own--and more importantly, why you should definitely, positively, should be putting them in and around your mouth.


WHAT YOU DO

1. Preheat your oven to 400 degrees F and line a baking sheet with foil. On it, toss together your diced sweet potatoes, paprika, salt and pepper to taste with only 1 tablespoon of the olive oil and spread out into a thin layer. Roast for 25 minutes, tossing once in between. Remove from the oven and set...somewhere. Aside. Out of your way.

Roasted sweet potato is the best sweet potato and there will be no debate on that fact.

2. In a large pot over medium heat, heat your olive oil and sauté up your onion, bell pepper, garlic, jalapeño, cumin, and oregano until everything is nice and soft. Add in the black beans, the tin of tomatoes, adobo sauce, sugar, and cocoa powder. Stir.

(Note: at this point, I added 1 cup of the black bean broth because the chili was too thick to simmer properly. If you opted for tinned beans, add in a cup of water or vegetable broth here.)

3. Bring the mixture to a simmer, then reduce heat to low and let it simmer merrily away for about 30 minutes, stirring occasionally. Then add in your sweet potato. Simmer for another 15 minutes-ish or until all heated through nicely.

Dunzo!

There are zillions of chili toppings, of course, but in my house we dig shredded cheddar cheese and saltine crackers. Cheese is obviously not vegan, but there are vegan cheese options so if you're into it, by all means, have at it.